1. cloudreve项目
1. Cloudreve 是什么?
Cloudreve 可以让您快速搭建起公私兼备的网盘系统。Cloudreve 在底层支持不同的云存储平台,用户在实际使用时无须关心物理存储方式。你可以使用 Cloudreve 搭建个人用网盘、文件分享系统,亦或是针对大小团体的公有云系统。
2. 安装cloudreve
mkdir -vp cloudreve/{uploads,avatar} \
&& touch cloudreve/conf.ini \
&& touch cloudreve/cloudreve.db && \
docker run -d \
--name cloudreve \
-p 5212:5212 \
--mount type=bind,source=/root/cloudreve/conf.ini,target=/cloudreve/conf.ini \
--mount type=bind,source=/root/cloudreve/cloudreve.db,target=/cloudreve/cloudreve.db \
-v /root/cloudreve/uploads:/cloudreve/uploads \
-v /root/cloudreve/avatar:/cloudreve/avatar \
cloudreve/cloudreve:3.5.2
Cloudreve 在首次启动时,会创建初始管理员账号,请注意保管管理员密码,此密码只会在首次启动时出现。如果您忘记初始管理员密码,需要删除同级目录下的cloudreve.db,重新启动主程序以初始化新的管理员账户。
[root@node2 ~]# docker logs -f cloudreve

   ___ _                 _
  / __\ | ___  _   _  __| |_ __ _____   _____
 / /  | |/ _ \| | | |/ _  | '__/ _ \ \ / / _ \
/ /___| | (_) | |_| | (_| | | |  __/\ V /  __/
\____/|_|\___/ \__,_|\__,_|_|  \___| \_/ \___|

   V3.5.2  Commit #a11f819  Pro=false
================================================

[Info]    2023-06-04 13:07:05 初始化数据库连接
[Info]    2023-06-04 13:07:05 开始进行数据库初始化...
[Info]    2023-06-04 13:07:05 初始管理员账号:admin@cloudreve.org
[Info]    2023-06-04 13:07:05 初始管理员密码:isFhsnT9
[Info]    2023-06-04 13:07:05 开始执行数据库脚本 [UpgradeTo3.4.0]
[Info]    2023-06-04 13:07:05 数据库初始化结束
[Info]    2023-06-04 13:07:05 初始化任务队列,WorkerNum = 10
[Info]    2023-06-04 13:07:05 初始化定时任务...
[Info]    2023-06-04 13:07:05 当前运行模式:Master
[Info]    2023-06-04 13:07:05 开始监听 :5212
[Info]    2023-06-04 13:07:05 有新的版本 [3.8.0-beta1] 可用,下载:https://github.com/cloudreve/Cloudreve/releases/tag/3.8.0-beta1


admin@cloudreve.org
Hs77wrA8
3. nginx反向代理cloudreve
docker run -d --privileged --name nginx -p 80:80 -v /root/nginx/default.conf:/etc/nginx/conf.d/default.conf nginx
或
docker run -d --privileged --link cloudreve:cloudreve --name nginx -p 80:80 -v /root/nginx/default.conf:/etc/nginx/conf.d/default.conf nginx

[root@node2 ~/nginx]# cat default.conf
server {
    listen       80;
    server_name  cloudreve.markli.cn;
    location / {
        proxy_redirect off;
        proxy_set_header Host $http_host;
        proxy_set_header X-Real-IP $remote_addr;
        proxy_set_header X-Real-Port $remote_port;
        proxy_set_header X-Forwarded-For $proxy_add_x_forwarded_for;
        proxy_pass http://192.168.15.202:5212;
        #proxy_pass http://cloudreve:5212;
    }
    error_page   500 502 503 504  /50x.html;
    location = /50x.html {
        root   /usr/share/nginx/html;
    }
}

[root@node2 ~/nginx]# docker exec nginx nginx -s reload
2. dozzle项目
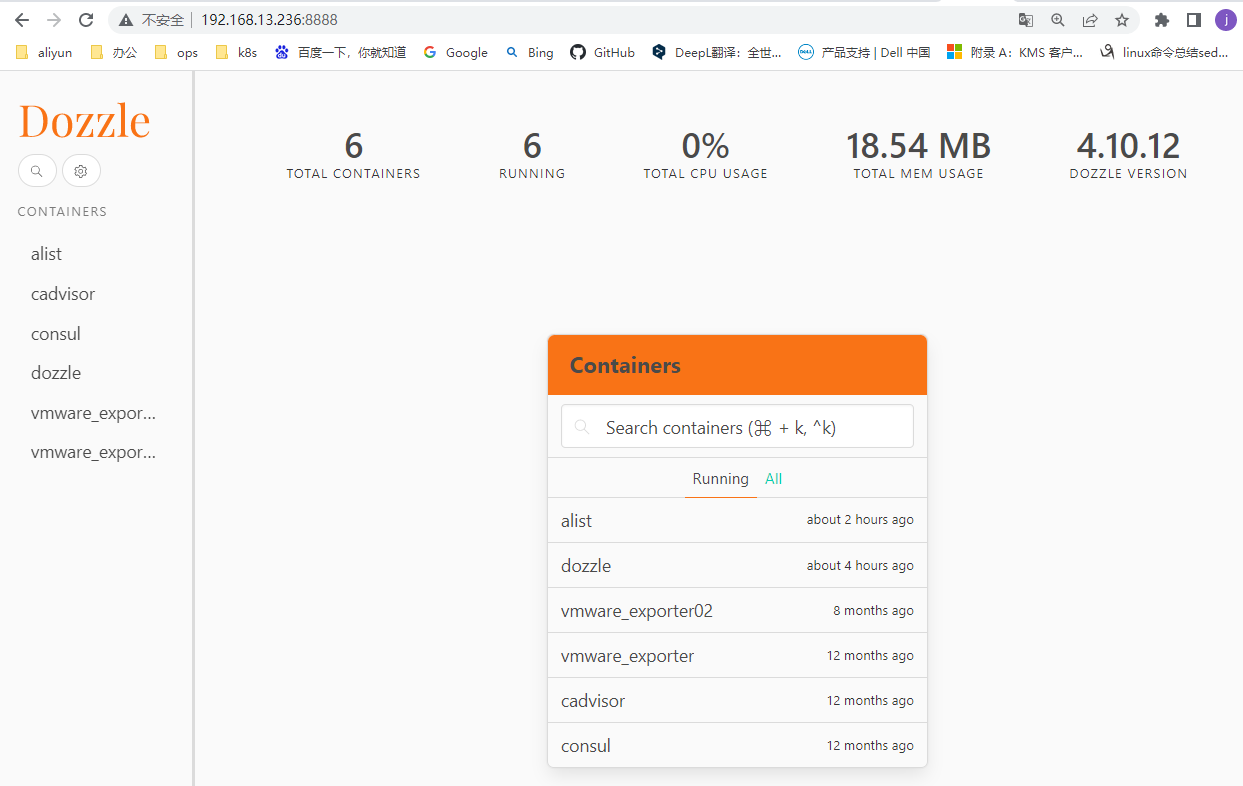
1. Dozzle是什么
Dozzle是一个小型的轻量级应用程序,具有基于Web的界面来监视Docker日志。它不存储任何日志文件。它仅用于实时监视容器日志。
2. 查看主机docker输出日志
docker run –name dozzle -d –volume=/var/run/docker.sock:/var/run/docker.sock -p 8888:8080 amir20/dozzle:latest
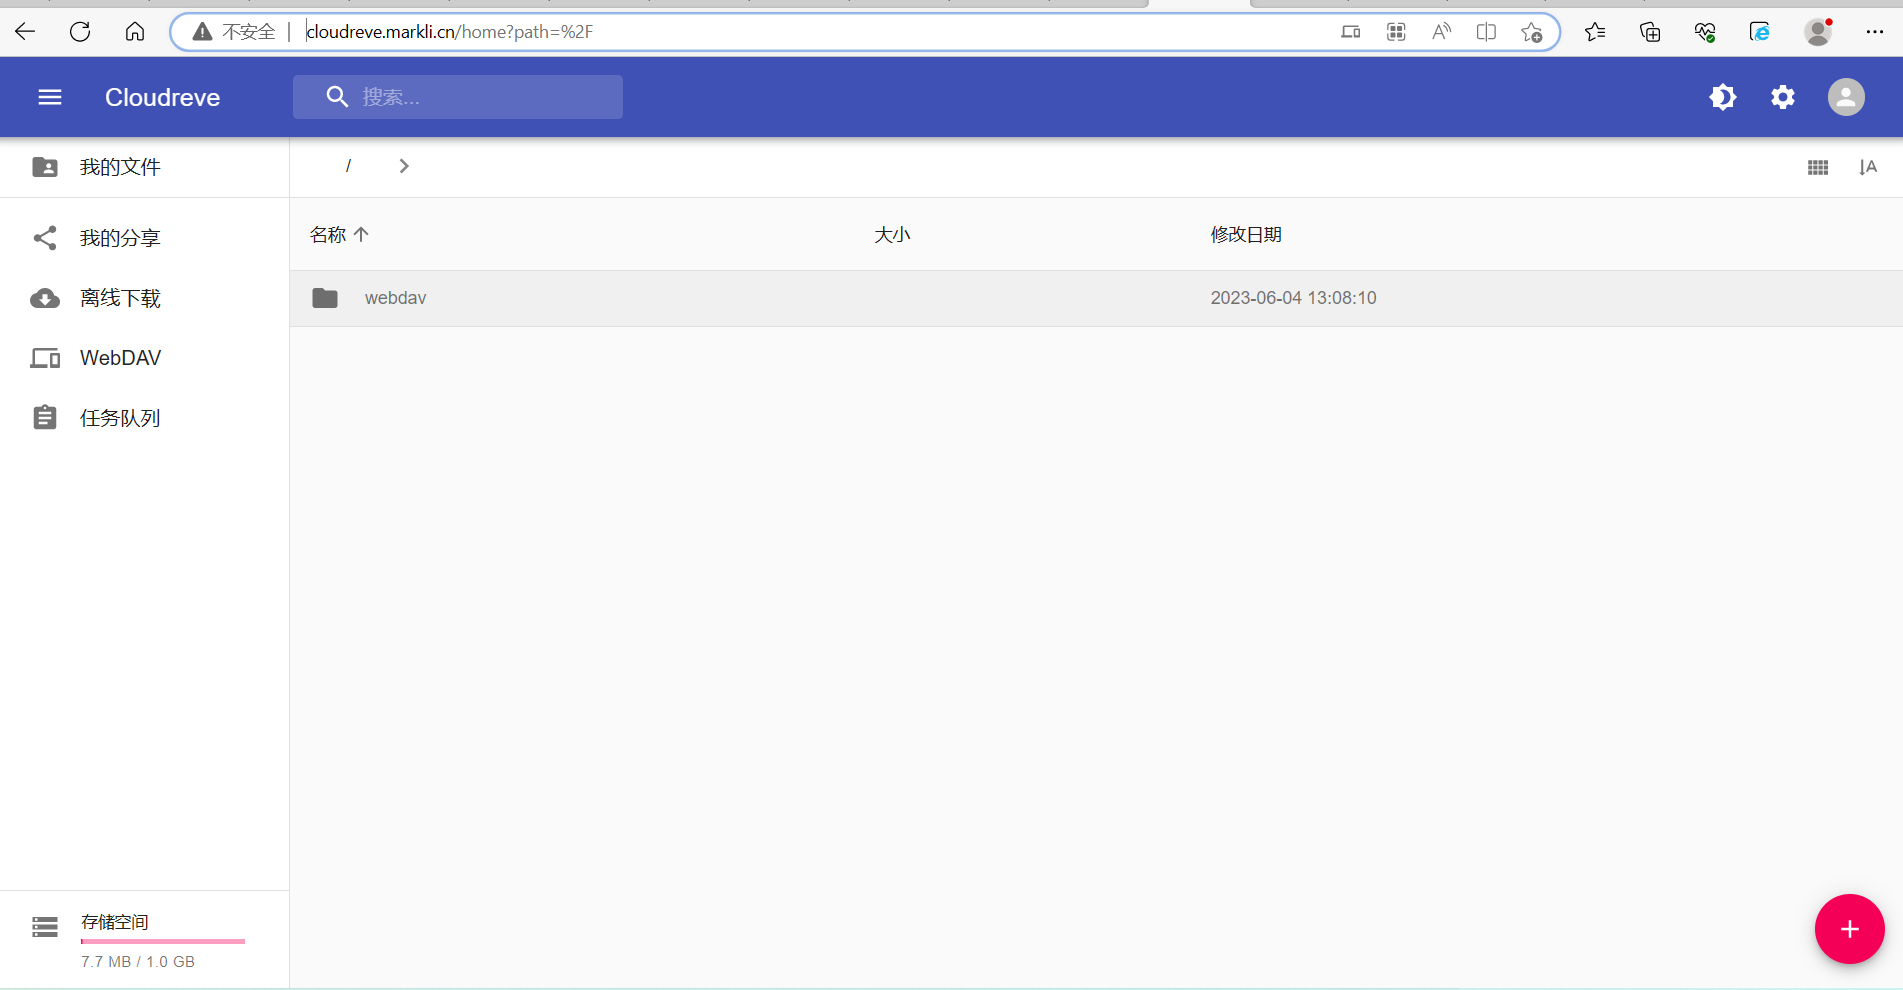
3. alist项目
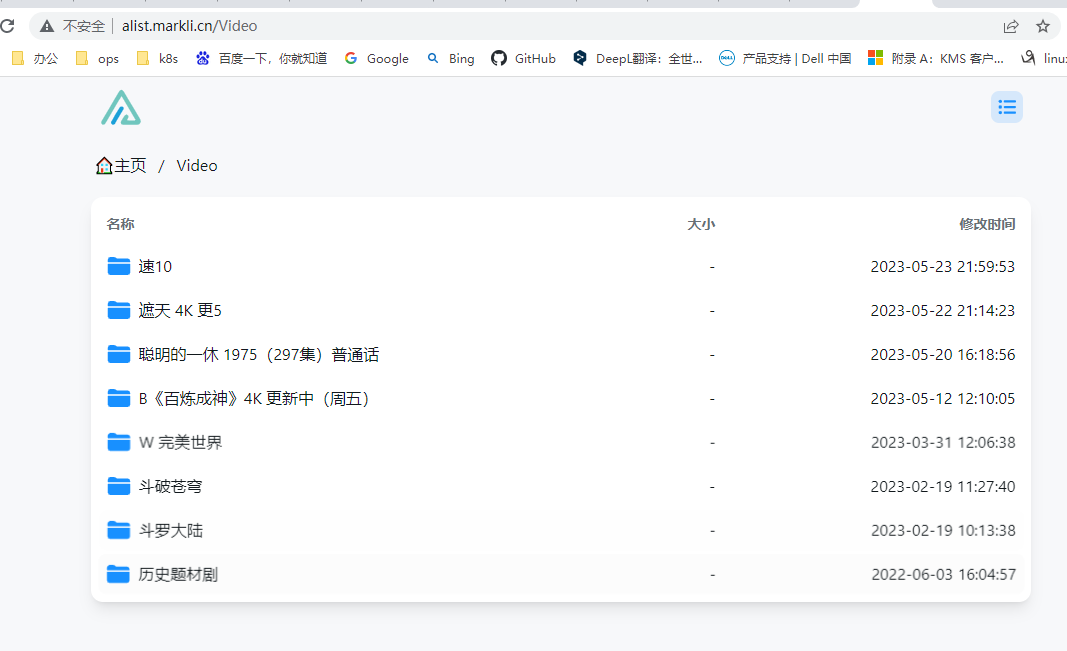
1. alist是什么
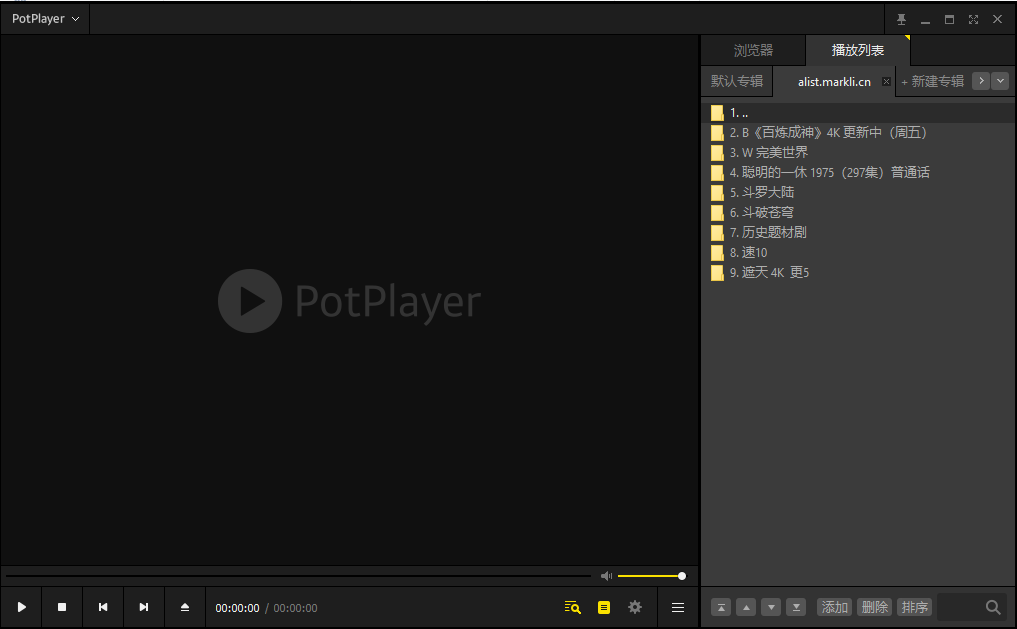
一个支持多种存储,支持网页浏览和 WebDAV 的文件列表程序,由 gin 和 Solidjs 驱动。
docker running
docker run -d --restart=always -v /etc/alist:/opt/alist/data -p 5244:5244 -e PUID=0 -e PGID=0 -e UMASK=022 --name="alist" xhofe/alist:latest
[root@prometheus ~]# docker logs alist
INFO[2023-06-05 07:10:22] reading config file: data/config.json
INFO[2023-06-05 07:10:22] config file not exists, creating default config file
INFO[2023-06-05 07:10:22] load config from env with prefix:
INFO[2023-06-05 07:10:22] init logrus...
INFO[2023-06-05 07:10:22] Successfully created the admin user and the initial password is: oblPN87u
INFO[2023-06-05 07:10:22] start server @ 0.0.0.0:5244
INFO[2023-06-05 07:10:22] qbittorrent not ready.
INFO[2023-06-05 07:10:22] Aria2 not ready.
binnary running
[root@prometheus download]# curl -OL https://github.com/axel-download-accelerator/axel/releases/download/v2.17.11/axel-2.17.11.tar.gz
[root@prometheus download]# axel -n 30 https://github.com/alist-org/alist/releases/download/v3.18.0/alist-linux-musl-amd64.tar.gz
[root@prometheus download]# tar xf alist-linux-musl-amd64.tar.gz
[root@prometheus download]# mv alist /usr/local/alist/bin/
[root@prometheus data]# cat /etc/profile.d/alist.sh
export PATH=$PATH:/usr/local/alist/bin
[root@prometheus data]# source /etc/profile
[root@prometheus data]# systemctl cat alist.service
# /usr/lib/systemd/system/alist.service
[Unit]
Description=alist
After=network.target

[Service]
Type=simple
WorkingDirectory=/usr/local/alist
ExecStart=/usr/local/alist/bin/alist server
Restart=on-failure

[Install]
WantedBy=multi-user.target
[root@prometheus data]# systemctl enable alist.service
[root@prometheus data]# systemctl start alist.service
[root@prometheus data]# journalctl -u alist
-- Logs begin at Sat 2023-06-03 11:00:17 CST, end at Mon 2023-06-05 16:41:15 CST. --
Jun 05 16:34:49 prometheus systemd[1]: Started alist.
Jun 05 16:34:49 prometheus alist[29881]: A file list program that supports multiple storage,
Jun 05 16:34:49 prometheus alist[29881]: built with love by Xhofe and friends in Go/Solid.js.
Jun 05 16:34:49 prometheus alist[29881]: Complete documentation is available at https://alist.nn.ci/
Jun 05 16:34:49 prometheus alist[29881]: Usage:
Jun 05 16:34:49 prometheus alist[29881]: alist [command]
Jun 05 16:34:49 prometheus alist[29881]: Available Commands:
Jun 05 16:34:49 prometheus alist[29881]: admin       Show admin user's info
Jun 05 16:34:49 prometheus alist[29881]: cancel2fa   Delete 2FA of admin user
Jun 05 16:34:49 prometheus alist[29881]: completion  Generate the autocompletion script for the specified shell
Jun 05 16:34:49 prometheus alist[29881]: help        Help about any command
Jun 05 16:34:49 prometheus alist[29881]: lang        Generate language json file
Jun 05 16:34:49 prometheus alist[29881]: restart     Restart alist server by daemon/pid file
Jun 05 16:34:49 prometheus alist[29881]: server      Start the server at the specified address
Jun 05 16:34:49 prometheus alist[29881]: start       Silent start alist server with `--force-bin-dir`
Jun 05 16:34:49 prometheus alist[29881]: stop        Stop alist server by daemon/pid file
Jun 05 16:34:49 prometheus alist[29881]: storage     Manage storage
Jun 05 16:34:49 prometheus alist[29881]: version     Show current version of AList
Jun 05 16:34:49 prometheus alist[29881]: Flags:
Jun 05 16:34:49 prometheus alist[29881]: --data string     config file (default "data")
Jun 05 16:34:49 prometheus alist[29881]: --debug           start with debug mode
Jun 05 16:34:49 prometheus alist[29881]: --dev             start with dev mode
Jun 05 16:34:49 prometheus alist[29881]: --force-bin-dir   Force to use the directory where the binary file is located as data directory
Jun 05 16:34:49 prometheus alist[29881]: -h, --help            help for alist
Jun 05 16:34:49 prometheus alist[29881]: --log-std         Force to log to std
Jun 05 16:34:49 prometheus alist[29881]: --no-prefix       disable env prefix
Jun 05 16:34:49 prometheus alist[29881]: Use "alist [command] --help" for more information about a command.
Jun 05 16:38:18 prometheus systemd[1]: Started alist.
Jun 05 16:38:18 prometheus alist[30144]: INFO[2023-06-05 16:38:18] reading config file: data/config.json
Jun 05 16:38:18 prometheus alist[30144]: INFO[2023-06-05 16:38:18] config file not exists, creating default config file
Jun 05 16:38:18 prometheus alist[30144]: INFO[2023-06-05 16:38:18] load config from env with prefix: ALIST_
Jun 05 16:38:18 prometheus alist[30144]: INFO[2023-06-05 16:38:18] init logrus...
Jun 05 16:38:18 prometheus alist[30144]: INFO[2023-06-05 16:38:18] Successfully created the admin user and the initial password is: teyOpaG2
Jun 05 16:38:18 prometheus alist[30144]: INFO[2023-06-05 16:38:18] start server @ 0.0.0.0:5244
Jun 05 16:38:18 prometheus alist[30144]: INFO[2023-06-05 16:38:18] Aria2 not ready.
Jun 05 16:38:18 prometheus alist[30144]: INFO[2023-06-05 16:38:18] qbittorrent not ready.
# user: admin  		password: teyOpaG2
2. 配置nginx
[root@prometheus data]# cat /usr/local/nginx/conf/nginx.conf
	server {
        listen       80;
        server_name  alist.markli.cn;

        location / {
		proxy_pass http://127.0.0.1:5244;
		proxy_set_header    Host            $proxy_host;
                proxy_set_header    X-Real-IP       $remote_addr;
                proxy_set_header    X-Forwarded-For $proxy_add_x_forwarded_for;
                proxy_hide_header   X-Powered-By;
			#auth_basic_user_file /usr/local/nginx/conf/passwdfile;
			#auth_basic	"alist authentication";
        }
    }
4. kubeshark项目
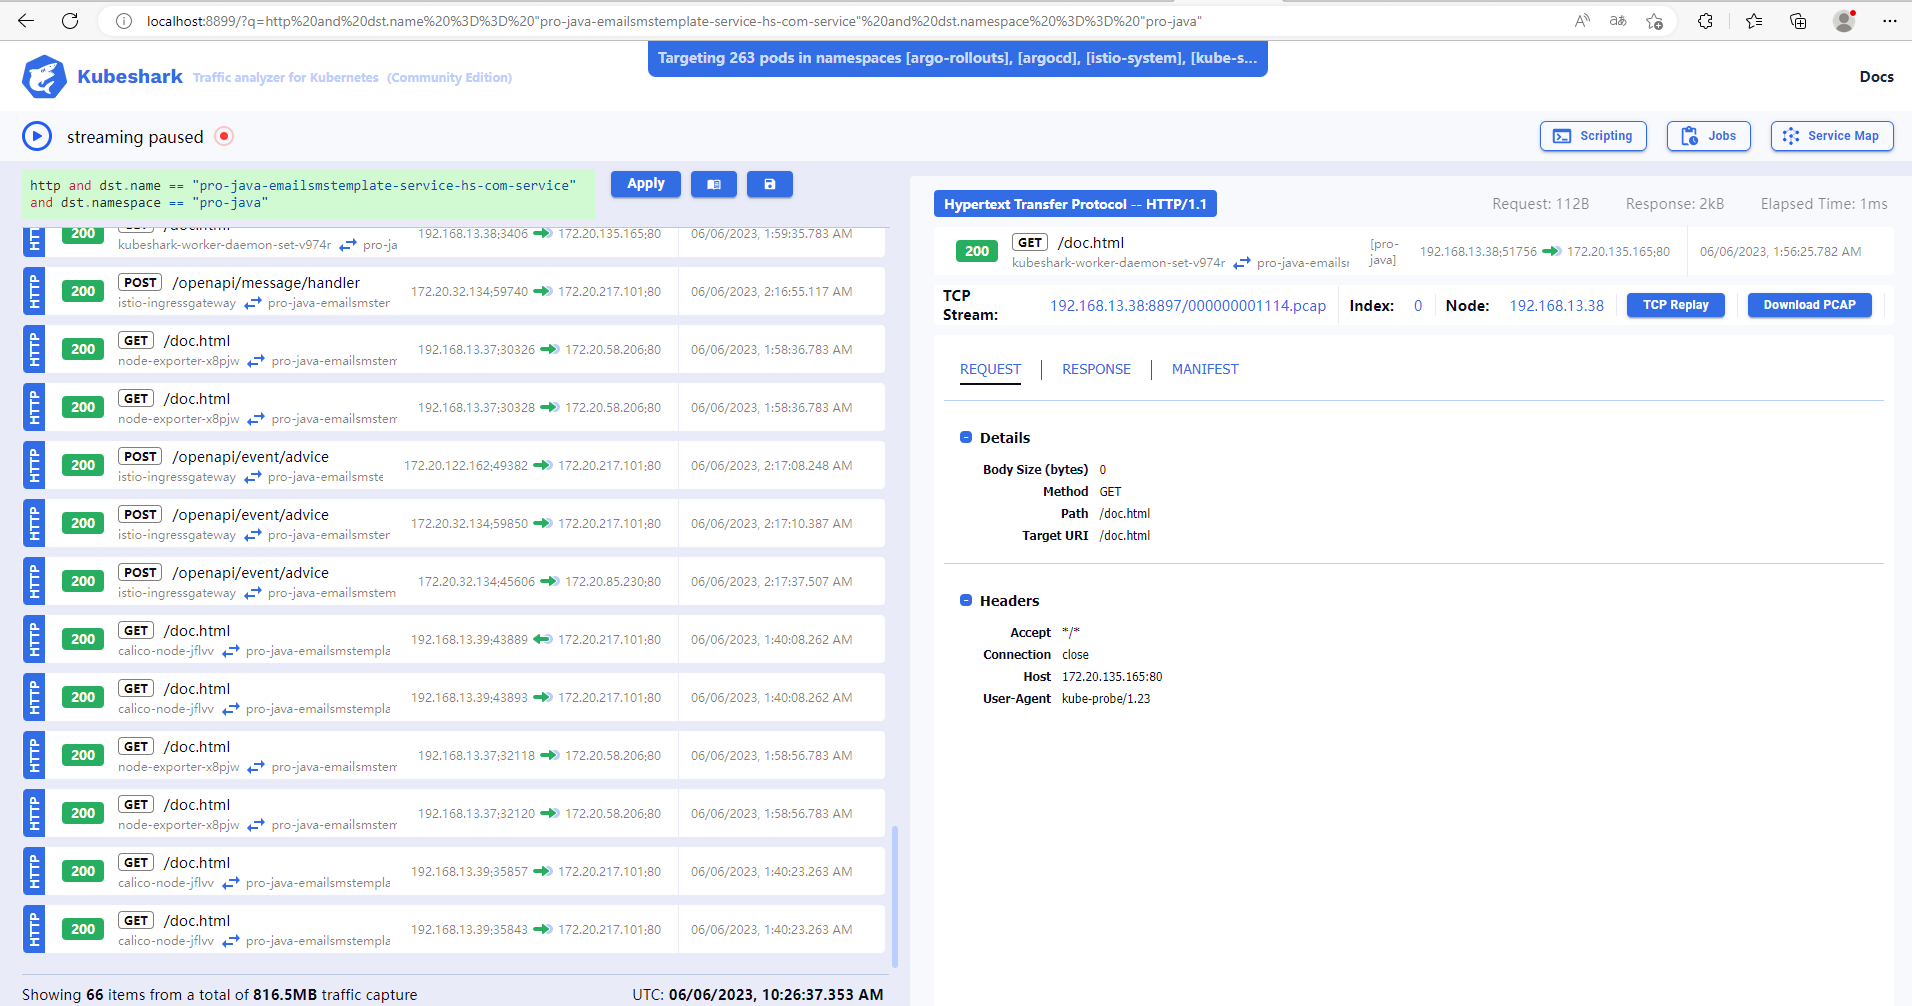
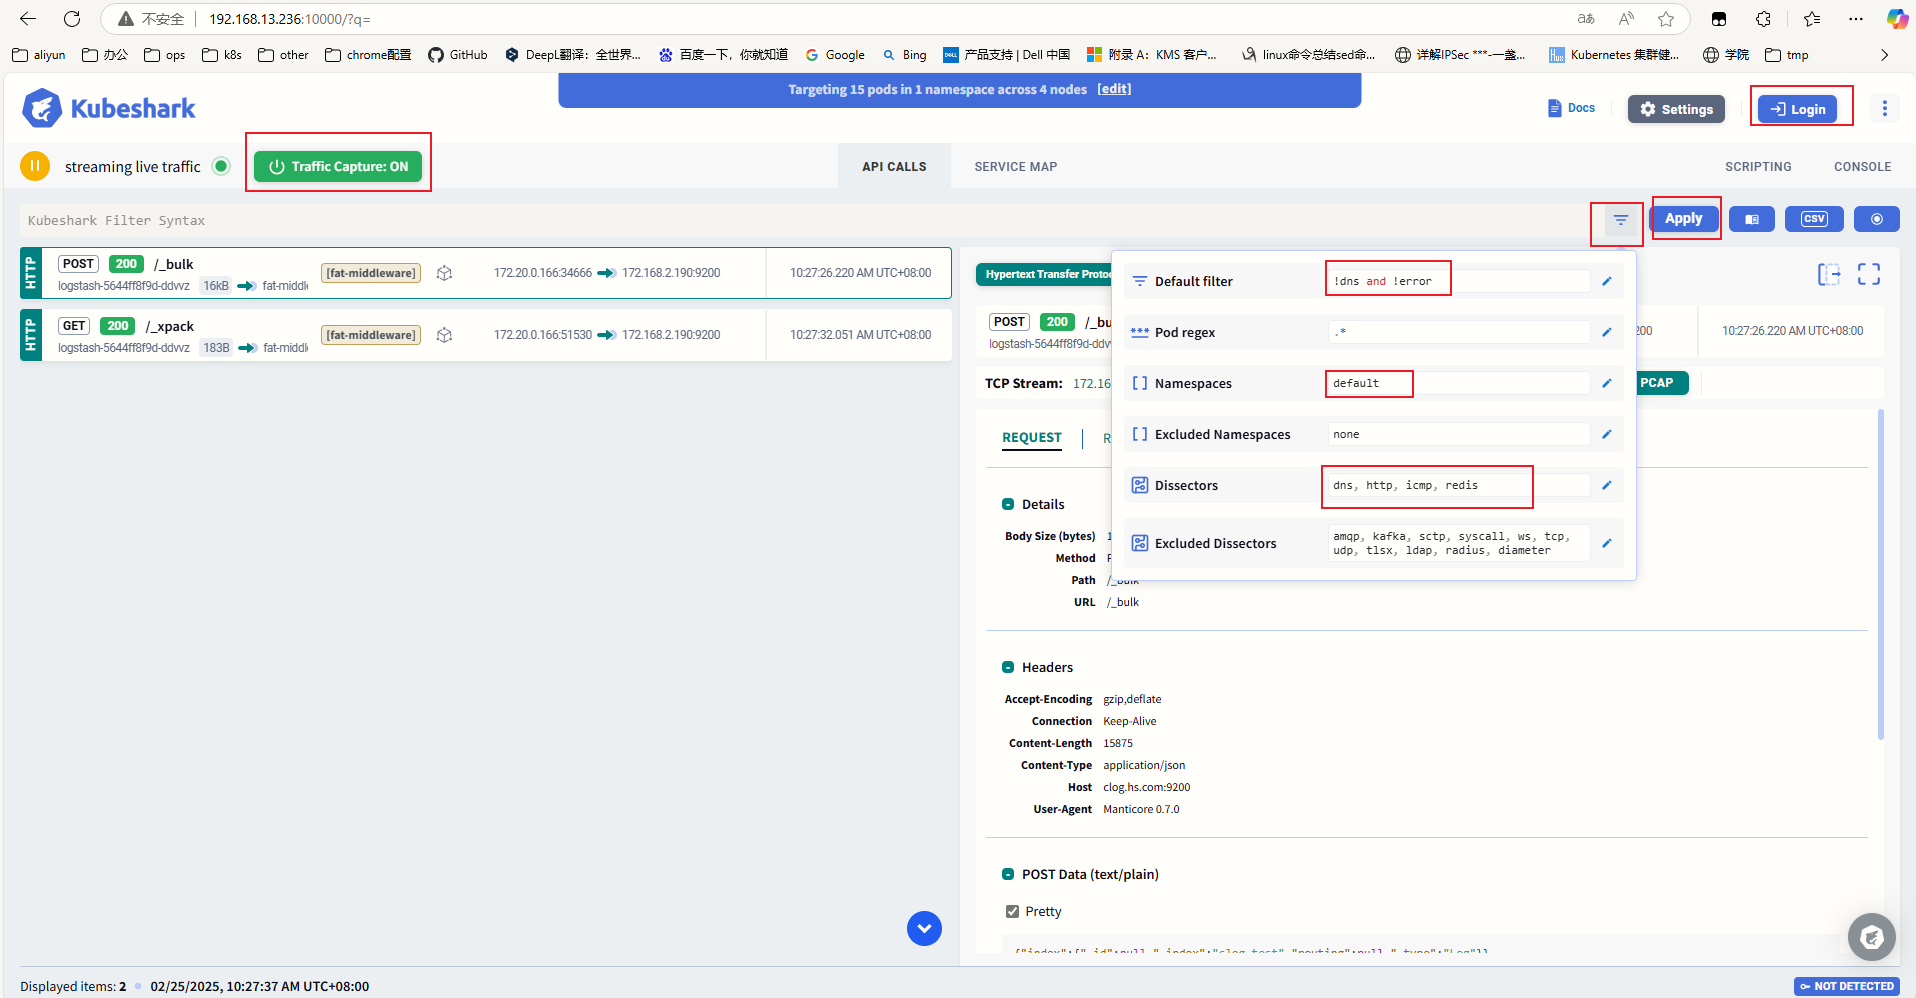
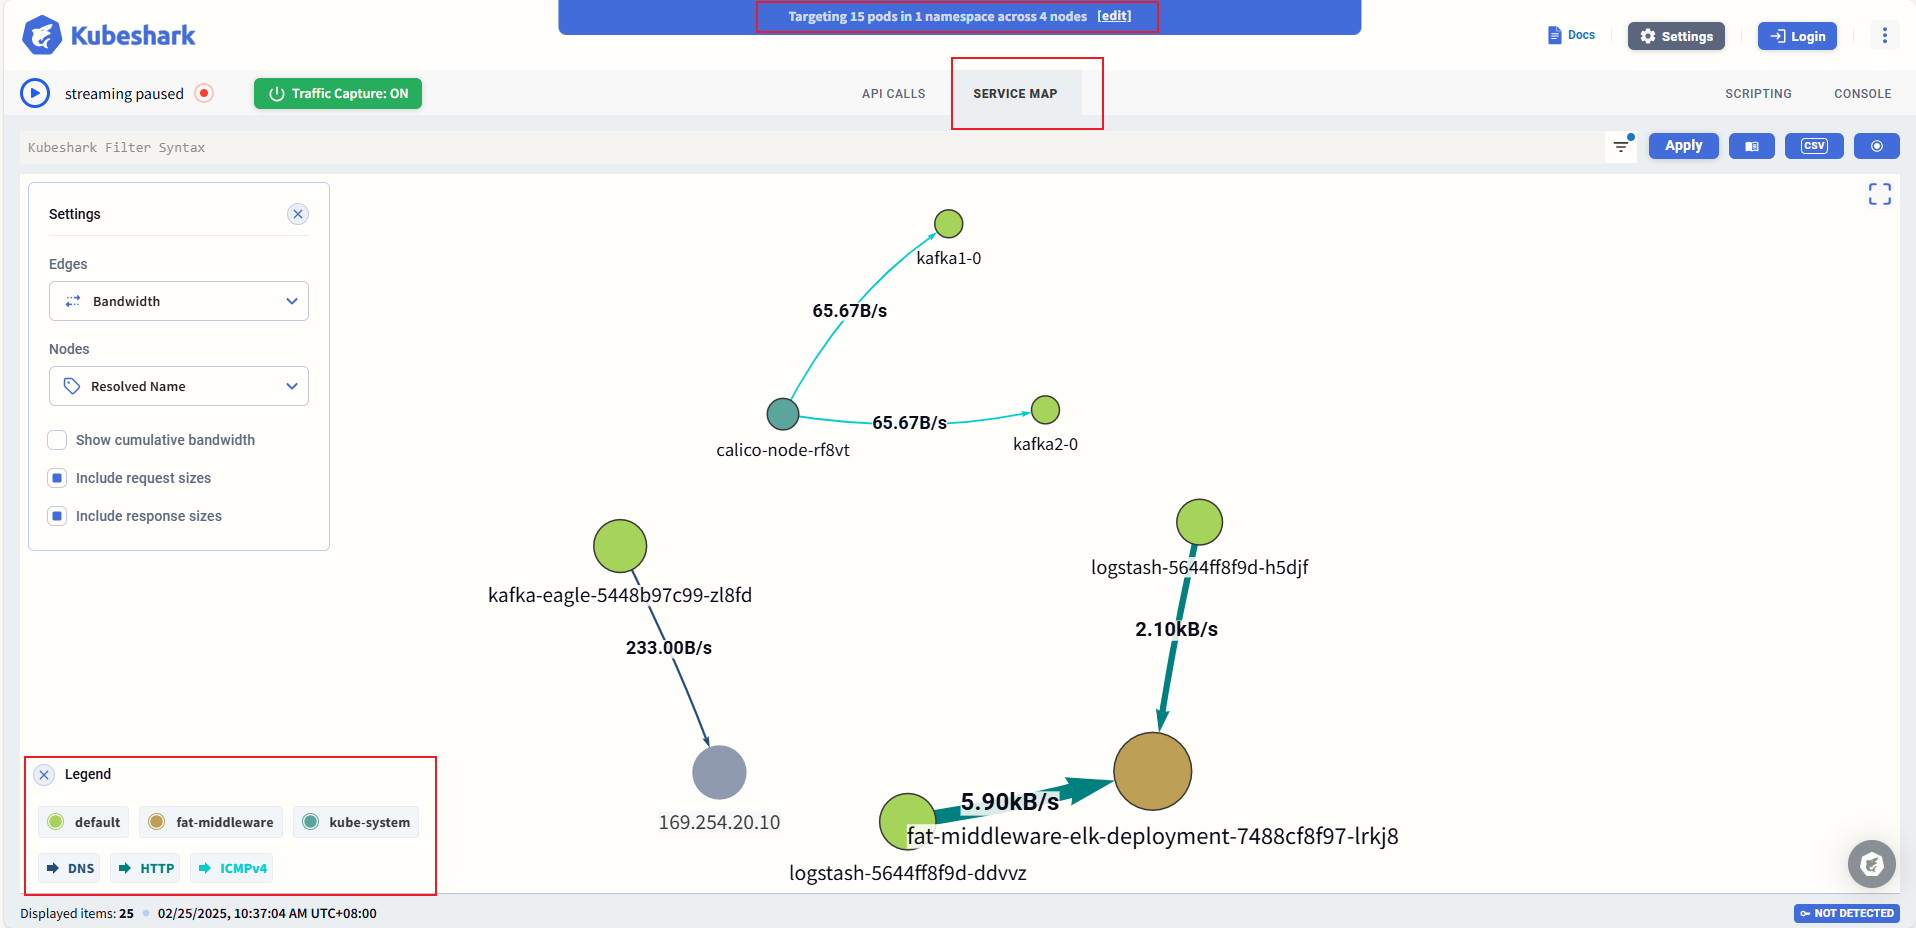
1. kubeshark是什么
Kubeshark 是 Kubernetes 的 API 流量分析器,提供对kubeshark内部网络的实时协议级可见性,捕获、剖析和监控进出容器、Pod 和集群的所有流量和有效负载。
Kubeshark为 SRE、DevOps 和安全团队提供:
- 集群范围的 API 流量可见性
- 零接触、全面的分布式跟踪
- 无限的 GenAI 辅助网络洞察
集群范围的可见性
Kubeshark提供实时、身份感知、协议级别的 API 流量可见性,使用户能够直接观察其 K8s 集群中每个(甚至隐藏)部分内的活动。
监控所有流量,包括**加密(TLS)**数据和有效负载,因为它们进入、退出并穿过容器、pod、命名空间、节点和集群。
协议支持
Kubeshark利用各种数据包捕获技术(例如eBPF、AF_PACKET)来捕获集群范围的第 4 层(TCP、UDP、SCTP)流量,并将其分解并重新组装为应用层协议。支持的协议包括:
- HTTP/1.0
- HTTP/1.1
- HTTP/2
- WebSocket
- AMQP
- Apache Kafka
- Redis
- gRPC over HTTP/2
- GraphQL over HTTP/1.1
- GraphQL over HTTP/2
- LDAP
- RADIUS
- DIAMETER
- ICMP
- DNS
- UDP
- SCTP
- TLS
- TCP
2. windows使用kubeshark


3. Linuxw使用kubeshark
安装kubeshark
[root@prometheus kubeshark]# export TAG=v52.4.2
[root@prometheus kubeshark]# curl -L -o kubeshark-install-$TAG.yaml [root@prometheus kubeshark]# https://raw.githubusercontent.com/kubeshark/kubeshark/refs/tags/$TAG/manifests/complete.yaml
[root@prometheus kubeshark]# kubectl apply -f kubeshark-install-v52.4.2.yaml
[root@prometheus kubeshark]# kubectl get svc | grep kubeshark
kubeshark-front            ClusterIP   10.68.37.70     <none>        80/TCP              26m
kubeshark-hub              ClusterIP   10.68.194.32    <none>        80/TCP              26m
kubeshark-hub-metrics      ClusterIP   10.68.114.153   <none>        9100/TCP            26m
kubeshark-worker-metrics   ClusterIP   10.68.64.117    <none>        49100/TCP           26m
[root@prometheus kubeshark]# kubectl port-forward --address 0.0.0.0 svc/kubeshark-front 10000:80
Forwarding from 0.0.0.0:10000 -> 8080
Handling connection for 10000
Handling connection for 10000
Handling connection for 10000
删除kubeshark
[root@prometheus kubeshark]# kubectl delete -f kubeshark-install-v52.4.2.yaml
5. hack-browser-data项目
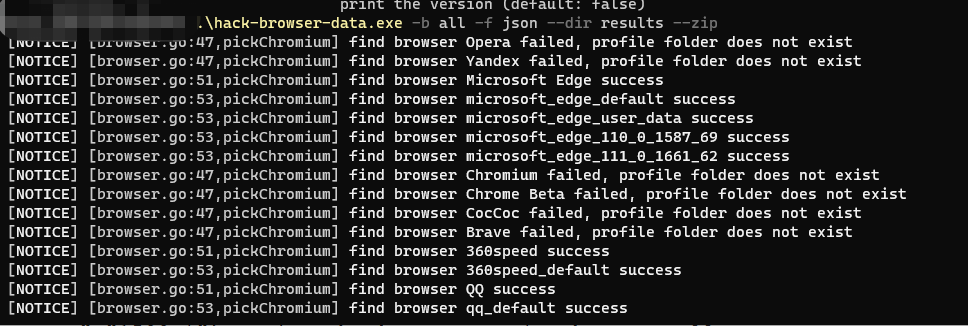
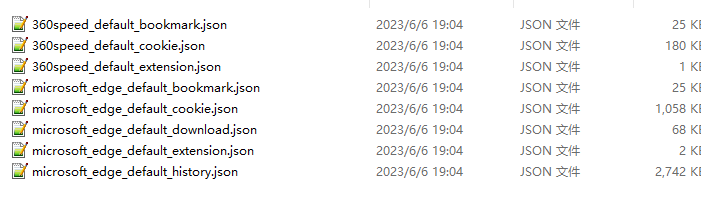
hack-browser-data
一款可全平台运行的浏览器数据导出解密工具。
6. hugo项目
hugo简介
世界上最快的网站构建框架
Hugo是最受欢迎的开源静态站点生成器之一。凭借其惊人的速度和灵活性,Hugo 让构建网站再次变得有趣。
1. 安装hugo
[root@prometheus download]# axel -n 30 https://github.com/gohugoio/hugo/releases/download/v0.113.0/hugo_0.113.0_linux-amd64.tar.gz
[root@prometheus download]# tar xf hugo_0.113.0_linux-amd64.tar.gz -C /usr/local/bin/
2. 安装git
[root@prometheus download]# yum install -y git
3. 配置hugo
[root@prometheus download]# mkdir /opt/hugo
[root@prometheus download]# cd /opt/hugo
[root@prometheus hugo]# hugo new site blog
[root@prometheus hugo]# cd blog/
[root@prometheus blog]# git init
Initialized empty Git repository in /opt/hugo/blog/.git/
# 此步可能需要科学上网
[root@prometheus blog]# git clone https://github.com/adityatelange/hugo-PaperMod themes/PaperMod

############
# 配置代理,方可进行下面clone
[root@docker /usr/local/hugo/quickstart]# export HTTP_PROXY="http://172.168.2.219:10809"
[root@docker /usr/local/hugo/quickstart]# export HTTPS_PROXY="http://172.168.2.219:10809"
[root@docker /usr/local/hugo/quickstart]# curl -I https://www.google.com
HTTP/1.1 200 Connection established
############


[root@prometheus blog]# cat hugo.yml
baseURL: "http://blog.markli.cn/"
languageCode: "zh-CN"
title: "JackBlog"
theme: "PaperMod"
paginate: 5

enableRobotsTXT: true
buildDrafts: false
buildFuture: false
buildExpired: false

googleAnalytics: UA-123-45

minify:
  disableXML: true
  minifyOutput: true

params:
  #env: opengraph # to enable google analytics, opengraph, twitter-cards and schema.
  env: production # to enable google analytics, opengraph, twitter-cards and schema.
  title: ExampleSite
  description: "ExampleSite description"
  keywords: [Blog, Portfolio, PaperMod]
  author: Me
  # author: ["Me", "You"] # multiple authors
  images: ["<link or path of image for opengraph, twitter-cards>"]
  DateFormat: "January 2, 2006"
  defaultTheme: auto # dark, light
  disableThemeToggle: false

  ShowReadingTime: true
  ShowShareButtons: true
  ShowPostNavLinks: true
  ShowBreadCrumbs: true
  ShowCodeCopyButtons: false
  ShowWordCount: true
  ShowRssButtonInSectionTermList: true
  UseHugoToc: true
  disableSpecial1stPost: false
  disableScrollToTop: false
  comments: false
  hidemeta: false
  hideSummary: false
  showtoc: false
  tocopen: false

  assets:
    # disableHLJS: true # to disable highlight.js
    # disableFingerprinting: true
    favicon: "<link / abs url>"
    favicon16x16: "<link / abs url>"
    favicon32x32: "<link / abs url>"
    apple_touch_icon: "<link / abs url>"
    safari_pinned_tab: "<link / abs url>"

  label:
    text: "Home"
    icon: /apple-touch-icon.png
    iconHeight: 35

  # profile-mode
  profileMode:
    enabled: false # needs to be explicitly set
    title: ExampleSite
    subtitle: "This is subtitle"
    imageUrl: "<img location>"
    imageWidth: 120
    imageHeight: 120
    imageTitle: my image
    buttons:
      - name: Posts
        url: posts
      - name: Tags
        url: tags

  # home-info mode
  homeInfoParams:
    Title: "Hi there \U0001F44B"
    Content: Welcome to my blog

  socialIcons:
    - name: grafana
      url: "https://monitor.markli.cn/grafana"
    - name: github
      url: "https://github.com/jacknotes"

  analytics:
    google:
      SiteVerificationTag: "XYZabc"
    bing:
      SiteVerificationTag: "XYZabc"
    yandex:
      SiteVerificationTag: "XYZabc"

  cover:
    hidden: true # hide everywhere but not in structured data
    hiddenInList: true # hide on list pages and home
    hiddenInSingle: true # hide on single page

#  editPost:
#    #URL: "https://github.com/<path_to_repo>/content"
#    URL: "http://192.168.75.100:1313/content"
#    Text: "Suggest Changes" # edit text
#    appendFilePath: true # to append file path to Edit link

  # for search
  # https://fusejs.io/api/options.html
  fuseOpts:
    isCaseSensitive: false
    shouldSort: true
    location: 0
    distance: 1000
    threshold: 0.4
    minMatchCharLength: 0
    keys: ["title", "permalink", "summary", "content"]
menu:
  main:
    - identifier: categories
      name: categories
      url: /categories/
      weight: 10
    - identifier: tags
      name: tags
      url: /tags/
      weight: 20
# Read: https://github.com/adityatelange/hugo-PaperMod/wiki/FAQs#using-hugos-syntax-highlighter-chroma
pygmentsUseClasses: true
markup:
  highlight:
    noClasses: false
    # anchorLineNos: true
    # codeFences: true
    # guessSyntax: true
    # lineNos: true
    # style: monokai


[root@prometheus content]# mkdir -p /opt/hugo/blog/content/posts
[root@prometheus blog]# ls content/posts/
cloudnative  frp.md
以systemd服务启动
[root@prometheus blog]# systemctl cat hugo.service
# /usr/lib/systemd/system/hugo.service
[Unit]
Description=https://gohugo.io/documentation/
After=network-online.target

[Service]
User=root
Group=root
Type=simple
WorkingDirectory=/opt/hugo/blog
ExecStart=/usr/local/bin/hugo server --config=/opt/hugo/blog/hugo.yml --buildDrafts --baseURL=http://blog.markli.cn/ --appendPort=false --theme=/opt/hugo/blog/themes/PaperMod/
Restart=on-failure

[Install]
WantedBy=multi-user.target
4. 通过nginx反向代理
    server {
        listen       80;
        server_name  blog.markli.cn;
	rewrite ^(.*)$ https://${server_name}$1 permanent;
    }
    server {
        listen       443;
        server_name  blog.markli.cn;
	ssl_certificate /etc/letsencrypt/live/blog.markli.cn/fullchain.pem;
        ssl_certificate_key /etc/letsencrypt/live/blog.markli.cn/privkey.pem;
        ssl_session_timeout 5m;
        ssl_ciphers ECDHE-RSA-AES128-GCM-SHA256:ECDHE:ECDH:AES:HIGH:!NULL:!aNULL:!MD5:!ADH:!RC4:!DH:!DHE;
        ssl_protocols TLSv1.2 TLSv1.3;
        ssl_prefer_server_ciphers on;

        location / {
		proxy_pass http://127.0.0.1:1313;
		proxy_set_header    Host            $proxy_host;
                proxy_set_header    X-Real-IP       $remote_addr;
                proxy_set_header    X-Forwarded-For $proxy_add_x_forwarded_for;
                proxy_hide_header   X-Powered-By;
        }
    }
5. hugo主题更换
# 官方主题市场
https://themes.gohugo.io/
# 本地主题目录
[root@docker /usr/local/hugo/quickstart]# ls themes/
ananke
# 下载第三方主题到主题目录,必须带特定目录,否则主题不可用
[root@docker /usr/local/hugo/quickstart]# git clone https://github.com/adityatelange/hugo-PaperMod themes/PaperMod
[root@docker /usr/local/hugo/quickstart]# ls themes/PaperMod/
assets  go.mod  i18n  images  layouts  LICENSE  README.md  theme.toml
# 切换指定主题
[root@docker /usr/local/hugo/quickstart]# vim hugo.toml
theme = 'PaperMod'
7. posh项目
适用于多种 shell 的终端提示个性化工具。该项目内置多款主题开箱即用,支持 Windows、Linux、macOS 三个系统上的 PowerShell、Bash、Zsh 等多种 shell,自动补全你输入的每个命令
# 下载程序
curl https://github.com/JanDeDobbeleer/oh-my-posh/releases/download/v17.5.3/posh-windows-amd64.exe
# 将posh-windows-amd64.exe放入到环境变量中


# 下载字体
https://www.nerdfonts.com/font-downloads
https://github.com/ryanoasis/nerd-fonts/releases/download/v3.0.2/Agave.zip
# 将字体解压放到C:\Windows\Fonts目录下


# 下载主题
https://github.com/JanDeDobbeleer/oh-my-posh/releases/download/v17.5.3/themes.zip
# 将主题解压放到C:\Users\$USER\AppData\Local\Programs\oh-my-posh\themes目录下,没有此目录则新建


# 安装完成后打开Windows Terminal然后按"Ctrl+Shift+,(逗号)"来打开settings.json配置文件将"defaults": {}改成
"defaults":
        {
            "font":
            {
                "face": "Agave Nerd Font Propo"
            }
        }
并保存退出


# 然后在Windows Terminal中的powershell中输入并回车notepad $profile,第一次会显示找不到该文件,选择创建新文件,然后输入如下内容并保存
oh-my-posh init pwsh | Invoke-Expression
# 然后回到Windows terminal新建一个powershell,此处使用的是默认主题
# 若想修改主题,可以使用命令Get-PoshThemes查看上面下载安装的主题

# 更改默认主题为froczh.omp.json
posh init pwsh --config C:\Users\0799\AppData\Local\Programs\oh-my-posh\themes\gmay.omp.json  | Invoke-Expression
# 然后保存并在Windows Terminal中新建一个powershell即可看到新主题已成功配置
8. yearning项目
yearning开箱即用的MYSQL SQL审核工具
go+vue为Yearning带来了流畅且美观的用户界面与强大的性能。
Yearning 根据Mysql语法树解析自动审查Mysql语句语法规范并根据Yearning自身实现的审核规则进行功能性审核。
1. 运行
root@ansible:/download/Yearning/docker# cat docker-compose.yml
version: '3'

services:
    yearning:
        image: chaiyd/yearning:latest
        environment:
           MYSQL_USER: yearning
           MYSQL_PASSWORD: ukC2ZkcG_ZTeb
           MYSQL_ADDR: mysql
           MYSQL_DB: yearning
           SECRET_KEY: dbcjqheupqjsuwsm
           IS_DOCKER: is_docker
        ports:
           - 8000:8000
        # 首次使用请先初始化
        command: /bin/bash -c "./Yearning install && ./Yearning run"
        depends_on:
           - mysql
        restart: always

    mysql:
        image: mysql:5.7
        environment:
           MYSQL_ROOT_PASSWORD: ukC2ZkcG_ZTeb
           MYSQL_DATABASE: yearning
           MYSQL_USER: yearning
           MYSQL_PASSWORD: ukC2ZkcG_ZTeb
        command:
           - --character-set-server=utf8mb4
           - --collation-server=utf8mb4_general_ci
        volumes:
           - ./data/mysql:/var/lib/mysql

# 默认账号:admin,默认密码:Yearning_admin

root@ansible:/download/Yearning/docker# docker ps -a
CONTAINER ID        IMAGE                    COMMAND                  CREATED             STATUS              PORTS                    NAMES
5d314f318d40        chaiyd/yearning:latest   "/usr/bin/dumb-init …"   45 hours ago        Up 45 hours         0.0.0.0:8000->8000/tcp   docker_yearning_1
cf1c93e201c2        mysql:5.7                "docker-entrypoint.s…"   45 hours ago        Up 45 hours         3306/tcp, 33060/tcp      docker_mysql_1
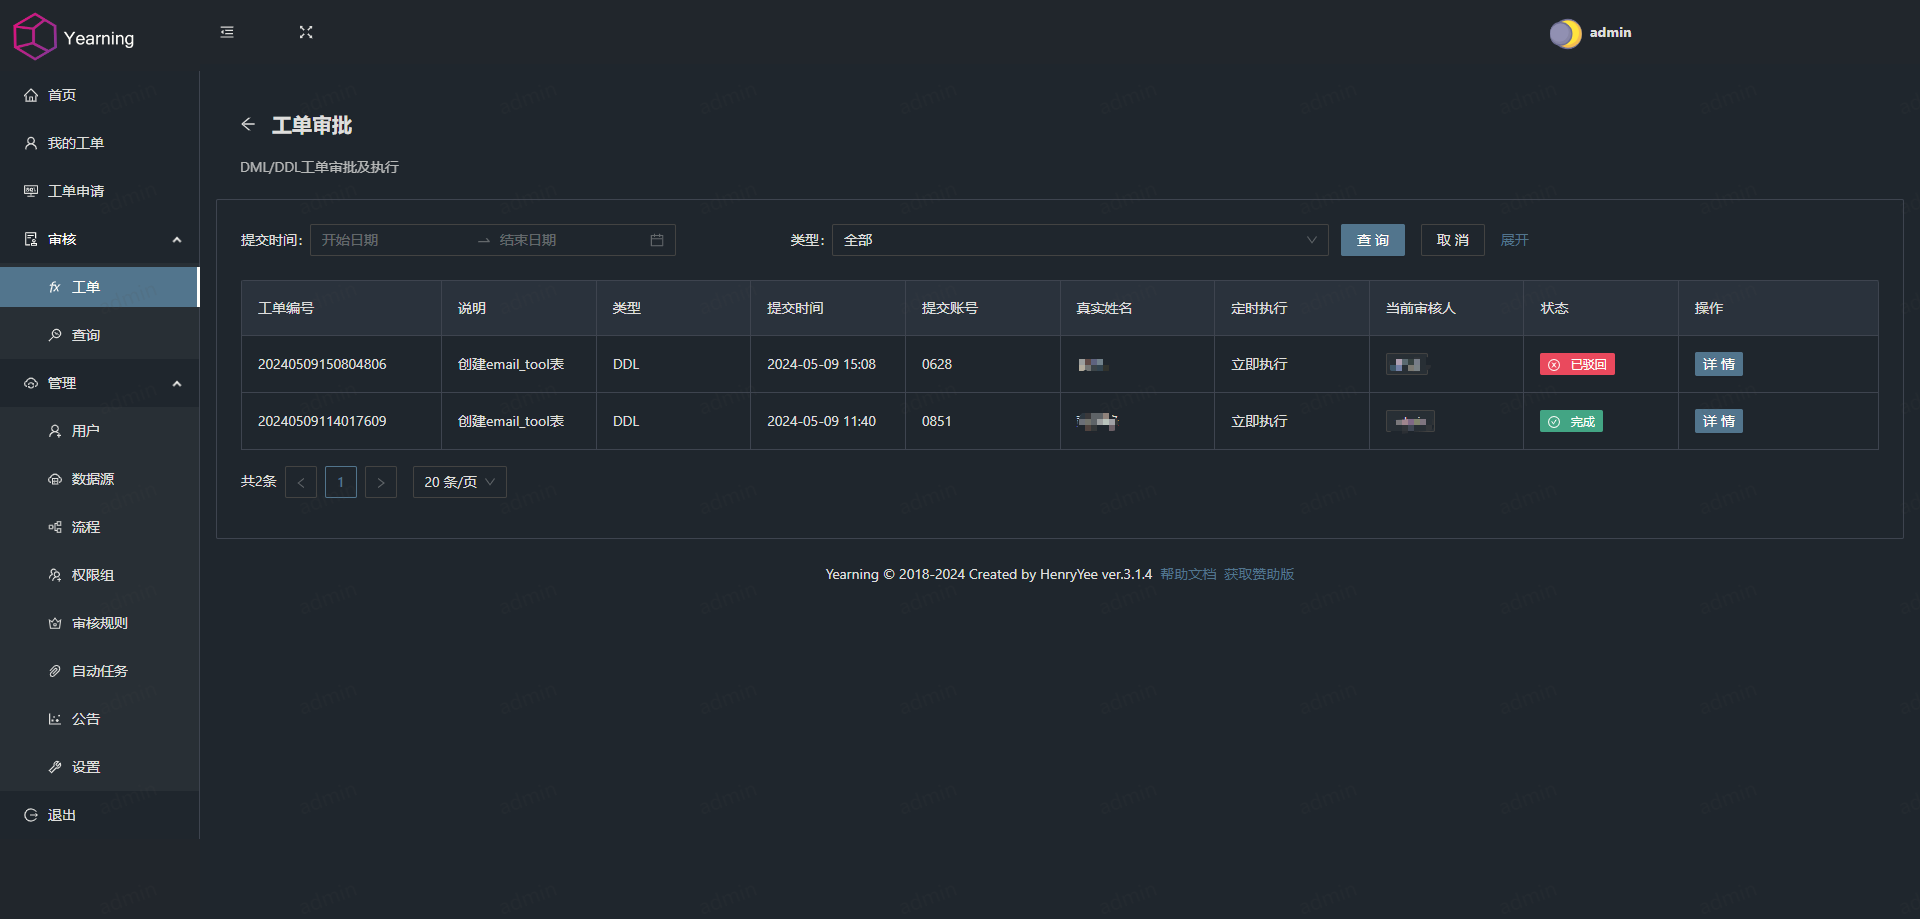
2. 使用
9. syncthing
syncthing开源的持续文件同步软件
1. 安装
[ops0799@hs-backup /download]$ sudo curl -OL https://github.com/syncthing/syncthing/releases/download/v1.27.7/syncthing-linux-amd64-v1.27.7.tar.gz
[ops0799@hs-backup /download]$ ls
syncthing-linux-amd64-v1.27.7.tar.gz
[ops0799@hs-backup /download]$ sudo tar -xf syncthing-linux-amd64-v1.27.7.tar.gz -C /usr/local/
[ops0799@hs-backup /download]$ sudo ln -sv /usr/local/syncthing-linux-amd64-v1.27.7/ /usr/local/syncthing
‘/usr/local/syncthing’ -> ‘/usr/local/syncthing-linux-amd64-v1.27.7/’
[ops0799@hs-backup /usr/local/syncthing]$ ls
AUTHORS.txt  etc  LICENSE.txt  README.txt  syncthing
2. 配置
# 配置用户
[ops0799@syncthing /usr/local/syncthing]$ sudo groupadd -r syncthing
[ops0799@syncthing /usr/local/syncthing]$ sudo useradd -r -g syncthing -d /data/syncthing syncthing
[ops0799@syncthing /usr/local/syncthing]$ id syncthing
uid=996(syncthing) gid=994(syncthing) groups=994(syncthing)
# 配置目录
[ops0799@syncthing /usr/local]$ sudo chown -R root.syncthing syncthing-linux-amd64-v1.27.7/
[ops0799@syncthing /usr/local]$ sudo chmod -R 775 syncthing-linux-amd64-v1.27.7/
[ops0799@syncthing /usr/local]$ sudo ls -ld syncthing-linux-amd64-v1.27.7/
drwxrwxr-- 4 root syncthing 4096 May 11 14:22 syncthing-linux-amd64-v1.27.7/
[ops0799@syncthing /usr/local]$ sudo chown -R root.syncthing /data/syncthing/
[ops0799@syncthing /usr/local]$ sudo chmod -R 775 /data/syncthing/
[ops0799@syncthing /usr/local]$ sudo ls -ld /data/syncthing/
drwxrwxr-- 3 root syncthing 30 May 11 13:53 /data/syncthing/
# 配置服务
[ops0799@hs-backup /usr/local/syncthing]$ sudo vim /usr/lib/systemd/system/syncthing.service
# 配置用户syncthing启动,此时源目录和目标目录中syncthing需要写入权限,如不好更改,建议使用root启动
[ops0799@hs-backup /usr/local/syncthing]$ cat /usr/lib/systemd/system/syncthing.service
[Unit]
Description=Syncthing - Open Source Continuous File Synchronization
After=network.target
[Service]
User=syncthing
ExecStart=/usr/local/syncthing/syncthing serve --no-browser --no-restart --logflags=0 --data=/data/syncthing --config=/usr/local/syncthing --gui-address=http://0.0.0.0:8384
Restart=on-failure
[Install]
WantedBy=multi-user.target
[ops0799@hs-backup /usr/local/syncthing]$ sudo mkdir -p /data/syncthing
[ops0799@hs-backup /usr/local/syncthing]$ sudo systemctl daemon-reload
[ops0799@hs-backup /usr/local/syncthing]$ sudo systemctl enable syncthing.service
[ops0799@hs-backup /usr/local/syncthing]$ sudo systemctl start syncthing.service
[ops0799@hs-backup /usr/local/syncthing]$ sudo ss -tnlp | grep 8384
LISTEN 0 128 [::]:8384 [::]:* users:(("syncthing",pid=2563,fd=30))
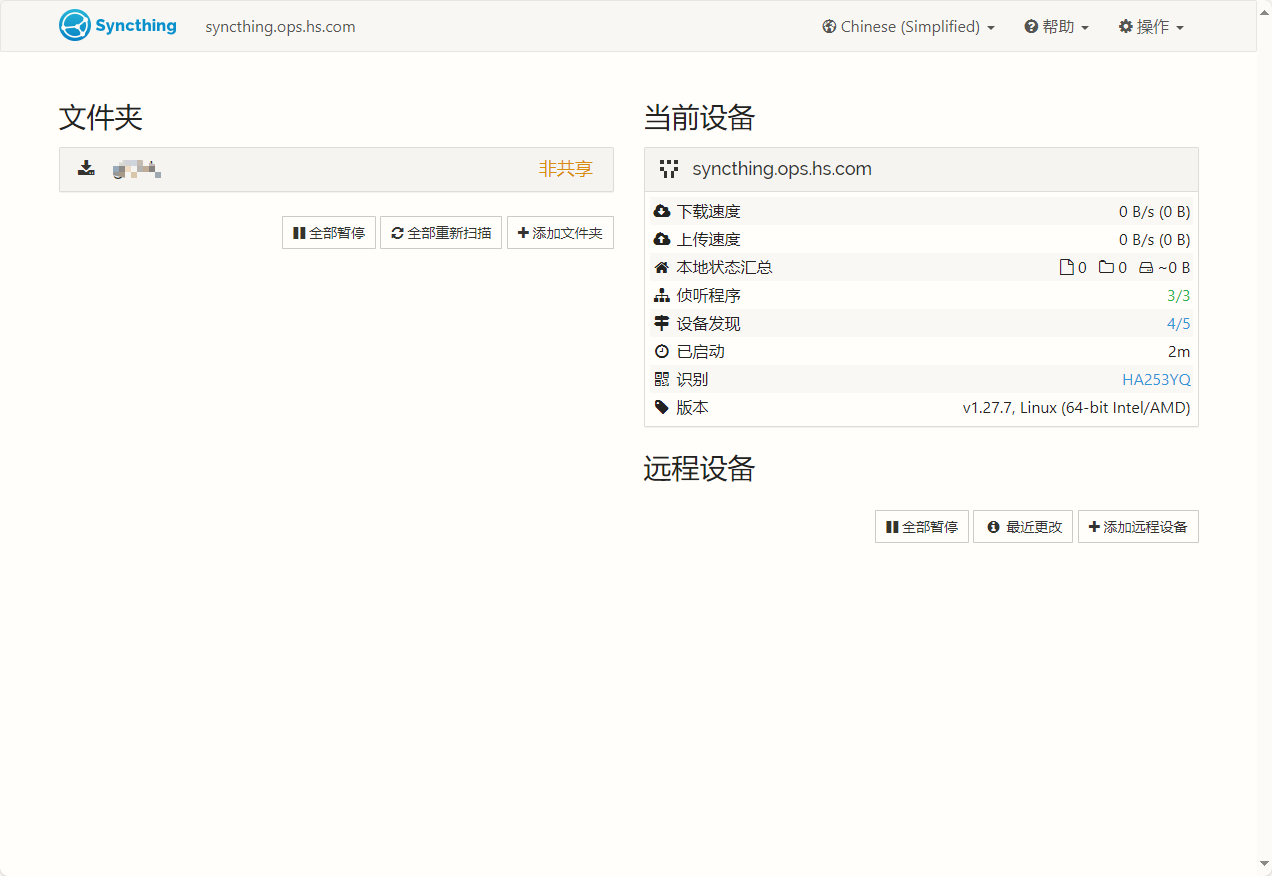
# 更改GUI主机名
[ops0799@hs-backup /usr/local/syncthing]$ vim /usr/local/syncthing/config.xml
<device id="HA253YQ-ULFJC5A-JBO5XLZ-24PCWGC-GHE52BY-O2XMNT3-C7YNSBG-PPSNMA4" name="syncthing.ops.hs.com"
[ops0799@hs-backup /usr/local/syncthing]$ sudo systemctl restart syncthing.service
3. 添加认证
# 添加htpasswd用户
[ops0799@nginx /usr/local/nginx/conf/conf.d]$ sudo htpasswd -c /usr/local/nginx/conf/password.sycnthing 0799
New password:
Re-type new password:
Adding password for user 0799

[ops0799@nginx /usr/local/nginx/conf/conf.d]$ cat syncthing.test.com.conf
server {
        listen       443 ssl;
        server_name     syncthing.test.com;
        ssl_certificate      cert/test.com.pem;
        ssl_certificate_key  cert/test.com.key;
        ssl_session_cache    shared:SSL:1m;
        ssl_session_timeout  5m;
        ssl_ciphers  HIGH:!aNULL:!MD5;
        ssl_prefer_server_ciphers  on;

        location / {
                proxy_next_upstream  error timeout http_502 http_503 http_504;
                proxy_redirect off;
                proxy_set_header Host $host;
                proxy_set_header X-Real-IP $remote_addr;
                proxy_set_header X-Real-Port $remote_port;
                proxy_set_header X-Forwarded-For $proxy_add_x_forwarded_for;
                proxy_pass https://10.10.10.202:8384;
                auth_basic_user_file /usr/local/nginx/conf/password.sycnthing;
                auth_basic      "syncthing" ;
                allow 222.66.21.210;
                allow 58.246.78.150;
                allow 47.103.112.73;
                allow 47.100.73.115;
                deny all;
        }

        error_page   500 502 503 504  /50x.html;
        location = /50x.html {
                root   html;
        }
}
添加htpasswd认证后,打开syncthing.test.com时需要使用htpasswd添加的用户访问
4. 用户访问
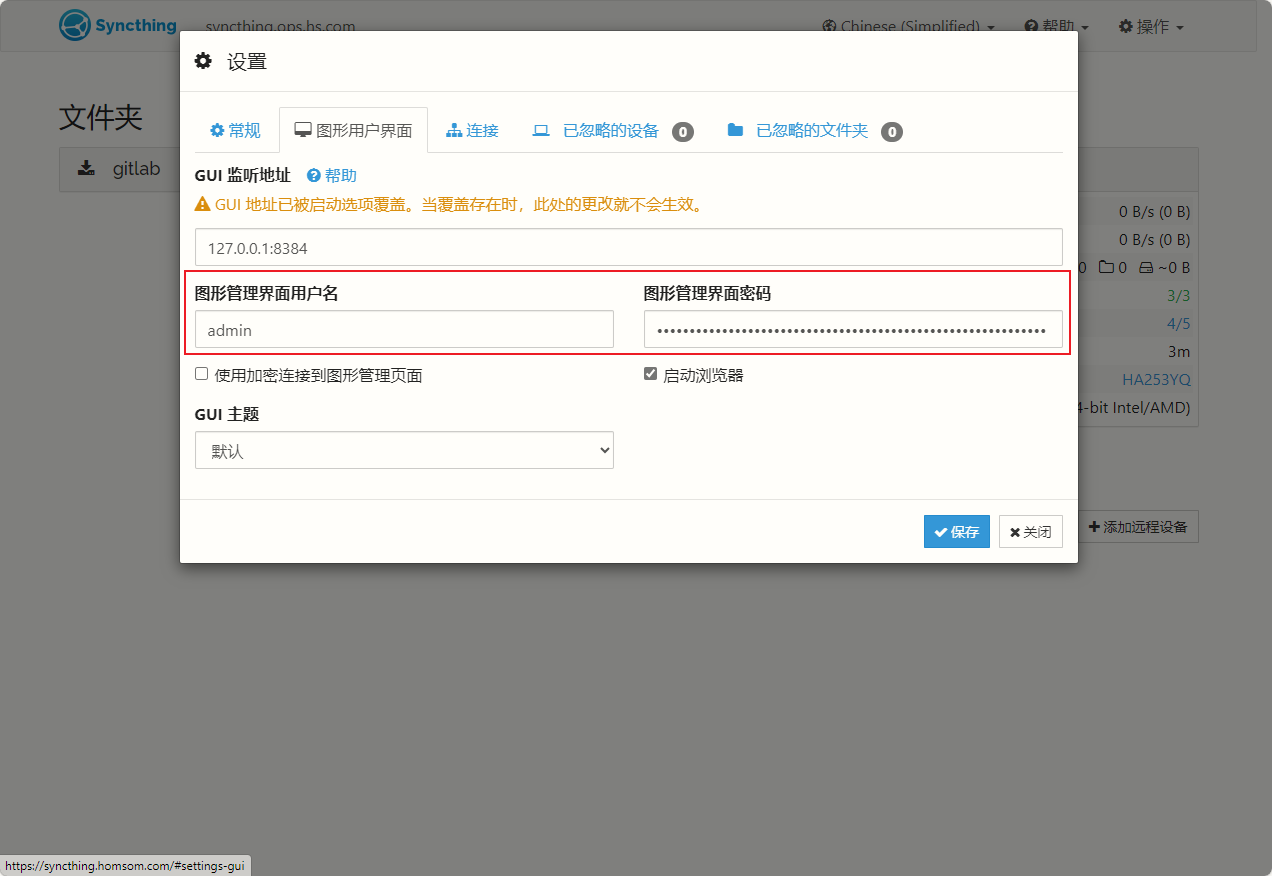
使用htpasswd认证
添加syncthing的GUI用户认证信息,实现双重认证
FAQ
1. 实际已同步但显示项目未同步
**问题描述:**设备1同步到设备2时,设备2其实已经同步完成了,但是在远程设备菜单下,确显示还有1222个项目未同步,并且所有项目大小为0,修改者ID并不是2个设备的ID
**原因:**可能是数据残留,因为之前删除过几次再添加新设备的。
**解决:**删除元数据目录,让其重新创建数据元数据,并不是同步的文件数据目录哈,别删除错。
默认存储路径(版本差异)
- v1.27.0及以上版本
- 数据目录:
$HOME/.local/state/syncthing或$XDG_STATE_HOME/syncthing - 配置文件目录:与数据目录分离,存放配置文件如
config.xml和证书文件。
- 数据目录:
- v1.27.0之前版本
- 数据目录:与配置文件合并,默认路径为
$HOME/.config/syncthing(Linux/macOS)或%LocalAppData%\Syncthing(Windows)
- 数据目录:与配置文件合并,默认路径为
# v1.27.0及以上版本的数据目录
[root@hw-blog syncthing]# ll -h /root/.local/state/syncthing/
total 44K
-rw-r--r-- 1 root root  794 Jul 25  2024 cert.pem
-rw------- 1 root root  23K Mar 27 22:08 config.xml
-rw-r--r-- 1 root root  782 Jul 25  2024 https-cert.pem
-rw------- 1 root root  288 Jul 25  2024 https-key.pem
drwxr-xr-x 2 root root 4.0K Mar 27 22:07 index-v0.14.0.db
-rw------- 1 root root  288 Jul 25  2024 key.pem

# 删除或移动元数据
[root@hw-blog syncthing]# mv /root/.local/state/syncthing/index-v0.14.0.db /tmp/
10. WinMerge
11. RustDesk
1. 安装服务端
在国内需要使用docker代理,方可运行起来
[root@hw-blog rustdesk]# cat /etc/systemd/system/docker.service.d/http-proxy.conf
[Service]
Environment="HTTP_PROXY=http://127.0.0.1:10809"
Environment="HTTPS_PROXY=http://127.0.0.1:10809"
Environment="NO_PROXY=localhost,127.0.0.1"
[root@hw-blog rustdesk]# systemctl restart docker

root@ansible:~/rustdesk# cat docker-compose.yml
version: '3'
services:
  hbbs:
    container_name: hbbs
    image: rustdesk/rustdesk-server:1.1.12
    environment:
      - "RELAY=hbbr:21117"
      - "ENCRYPTED_ONLY=1"
    command: hbbs
    volumes:
      - ./data:/root
    network_mode: "host"

    depends_on:
      - hbbr
    restart: unless-stopped

  hbbr:
    container_name: hbbr
    image: rustdesk/rustdesk-server:1.1.12
    command: hbbr
    volumes:
      - ./data:/root
    network_mode: "host"
    restart: unless-stopped

root@ansible:~/rustdesk# docker-compose -f docker-compose.yml up -d
[root@hw-blog rustdesk]# docker ps -a | grep rustdesk
fd8a2b31d7ba   rustdesk/rustdesk-server:1.1.12   "hbbs"                   43 seconds ago   Up 42 seconds                                                      hbbs
0c2308fa1489   rustdesk/rustdesk-server:1.1.12   "hbbr"                   43 seconds ago   Up 42 seconds                                                      hbbr
2. 端口参数
- hbbs: 21114(TCP):用于 Web 控制台,仅在Pro版本中可用。 21115(TCP):用于 NAT 类型测试。 21116(TCP/UDP):请注意,TCP 和 UDP 都应该启用 21116。 用于 ID 注册和心跳服务。 用于 TCP 打孔和连接服务。21116/UDP21116/TCP 21118(TCP):用于支持 Web 客户端。
- hbbr: 21117(TCP):用于 Relay 服务。 21119(TCP):用于支持 Web 客户端。
防火墙开放端口:TCP-21115、21116、21117,UDP-21116
3. 查看参数
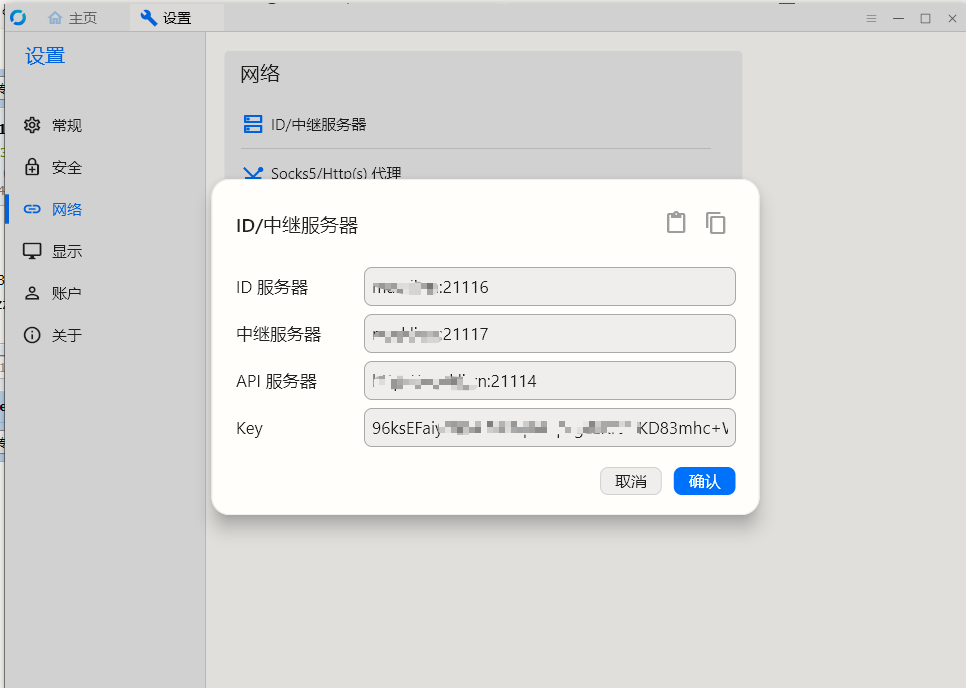
key:eNL0rQN0hSxr5TY91IzwBY0TH361QKvRxvf1FqMRwXQ= ID服务器:172.168.2.12:21116 中继服务器:172.168.2.12:21117
root@ansible:~# docker logs -f hbbs
[2024-12-17 03:36:34.527584 +00:00] INFO [src/common.rs:148] Private/public key written to id_ed25519/id_ed25519.pub
[2024-12-17 03:36:34.527636 +00:00] INFO [src/rendezvous_server.rs:1205] Key: eNL0rQN0hSxr5TY91IzwBY0TH361QKvRxvf1FqMRwXQ=
[2024-12-17 03:36:34.527640 +00:00] INFO [src/peer.rs:84] DB_URL=./db_v2.sqlite3
[2024-12-17 03:36:34.537387 +00:00] INFO [src/rendezvous_server.rs:99] serial=0
[2024-12-17 03:36:34.537407 +00:00] INFO [src/common.rs:46] rendezvous-servers=[]
[2024-12-17 03:36:34.537410 +00:00] INFO [src/rendezvous_server.rs:101] Listening on tcp/udp :21116
[2024-12-17 03:36:34.537412 +00:00] INFO [src/rendezvous_server.rs:102] Listening on tcp :21115, extra port for NAT test
[2024-12-17 03:36:34.537414 +00:00] INFO [src/rendezvous_server.rs:103] Listening on websocket :21118
[2024-12-17 03:36:34.538059 +00:00] INFO [libs/hbb_common/src/udp.rs:36] Receive buf size of udp [::]:21116: Ok(8388608)
[2024-12-17 03:36:34.538110 +00:00] INFO [src/rendezvous_server.rs:138] mask: None
[2024-12-17 03:36:34.538113 +00:00] INFO [src/rendezvous_server.rs:139] local-ip: ""
[2024-12-17 03:36:34.538118 +00:00] INFO [src/common.rs:46] relay-servers=[]
[2024-12-17 03:36:34.538249 +00:00] INFO [src/rendezvous_server.rs:153] ALWAYS_USE_RELAY=Y
[2024-12-17 03:36:34.538282 +00:00] INFO [src/rendezvous_server.rs:185] Start
[2024-12-17 03:36:34.538536 +00:00] INFO [libs/hbb_common/src/udp.rs:36] Receive buf size of udp [::]:0: Ok(8388608)
[2024-12-17 03:36:34.540939 +00:00] INFO [libs/hbb_common/src/udp.rs:36] Receive buf size of udp 0.0.0.0:0: Ok(8388608)

[root@hw-blog rustdesk]# cat /root/rustdesk/data/id*.pub
eNL0rQN0hSxr5TY91IzwBY0TH361QKvRxvf1FqMRwXQ=
4. 安装管理界面
[root@hw-blog rustdesk]# cat rustdesk-api.sh
docker run -d --name rustdesk-api -p 21114:21114 \
-v /root/rustdesk/api:/app/data \
-e TZ=Asia/Shanghai \
-e RUSTDESK_API_LANG=zh-CN \
-e RUSTDESK_API_RUSTDESK_ID_SERVER=127.0.0.1:21116 \
-e RUSTDESK_API_RUSTDESK_RELAY_SERVER=127.0.0.1:21117 \
-e RUSTDESK_API_RUSTDESK_API_SERVER=http://127.0.0.1:21114 \
-e RUSTDESK_API_RUSTDESK_KEY='eNL0rQN0hSxr5TY91IzwBY0TH361QKvRxvf1FqMRwXQ=' \
lejianwen/rustdesk-api:v2.6.2

[root@hw-blog rustdesk]# ./rustdesk-api.sh
[root@hw-blog rustdesk]# docker logs -f rustdesk-api
migrating.... 260
2025/01/16 16:26:50 1 0.0.0.0:21114
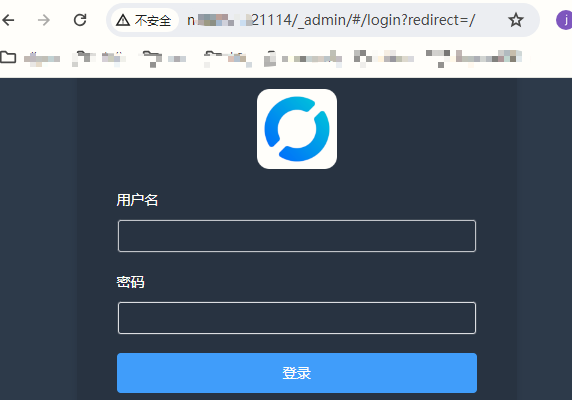
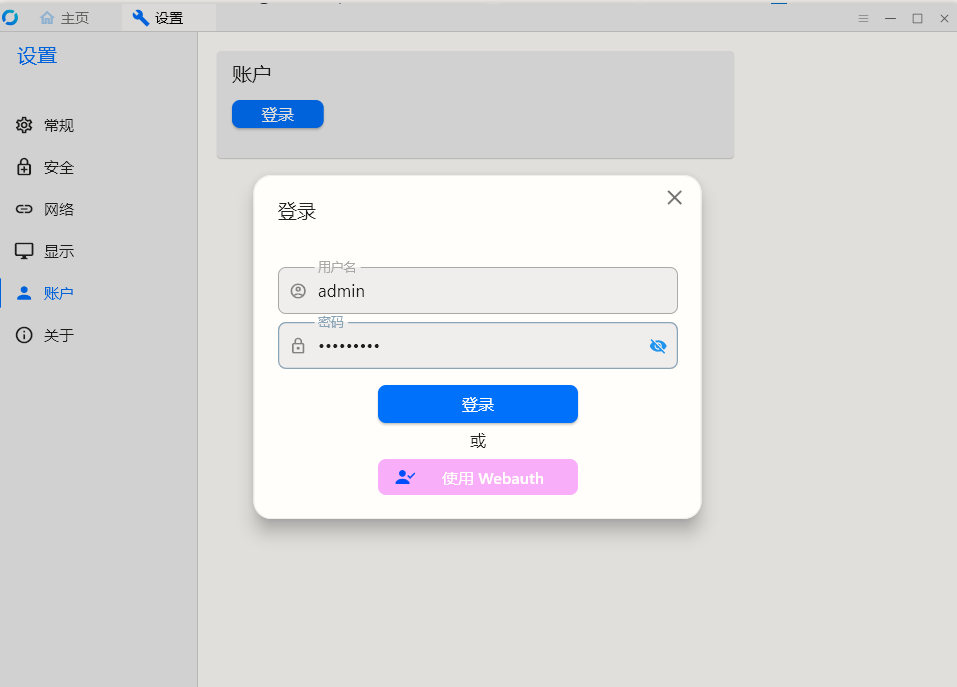
5. 访问管理界面
地址:IP:21114
默认密码:admin/admin
6. 客户端连接超时解决
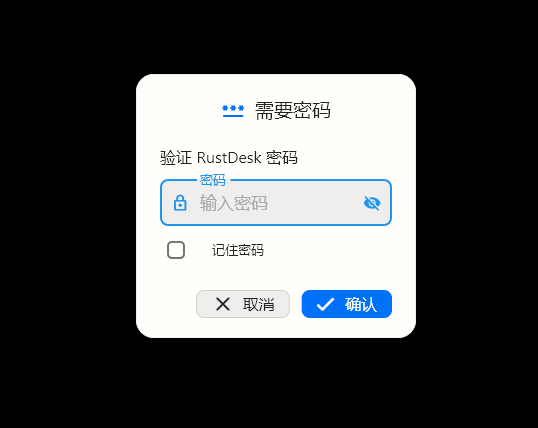
连接方安装上面链接的客户端即可解决超时问题
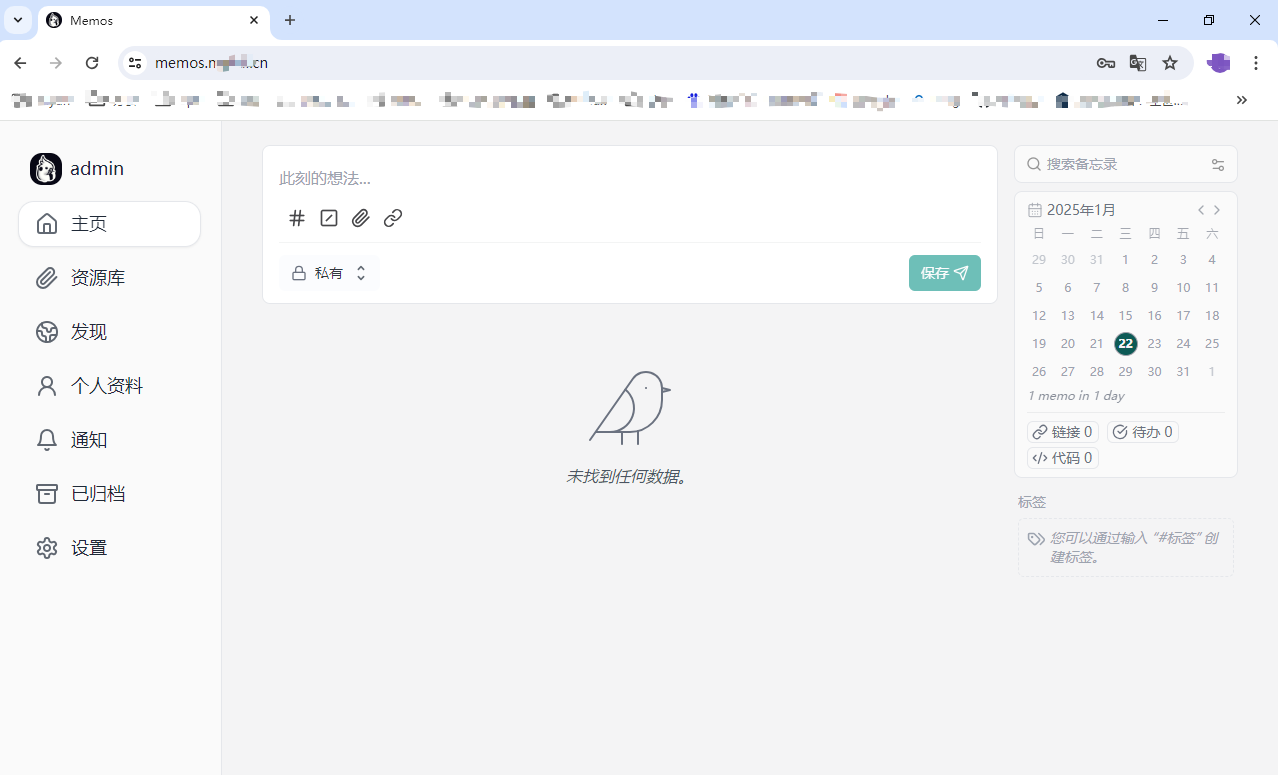
12. memos
1. 关于
memos是开源、轻量级的笔记解决方案。轻松创建有意义的笔记。您的笔记,您的方式。
2. 运行
[root@hw-blog memos]# docker run -d --name memos -p 5230:5230 -v ~/.memos/:/var/opt/memos neosmemo/memos:stable
[root@hw-blog memos]# docker ps | grep memos
0b6ef6a85cb6   neosmemo/memos:stable             "./memos"                About an hour ago   Up About an hour       0.0.0.0:5230->5230/tcp, :::5230->5230/tcp       memos
3. 反向代理
    server {
        listen       80;
        server_name  memos.markli.cn;
        rewrite ^(.*)$ https://${server_name}$1 permanent;
    }
    server {
        listen       443 ssl;
        server_name  memos.markli.cn;
        ssl_certificate /etc/letsencrypt/live/markli.cn/fullchain.pem;
        ssl_certificate_key /etc/letsencrypt/live/markli.cn/privkey.pem;
        ssl_session_timeout 1d;
        ssl_session_cache shared:MozSSL:10m;  # about 40000 sessions
        ssl_session_tickets off;
        ssl_ciphers ECDHE-ECDSA-AES128-GCM-SHA256:ECDHE-RSA-AES128-GCM-SHA256:ECDHE-ECDSA-AES256-GCM-SHA384:ECDHE-RSA-AES256-GCM-SHA384:ECDHE-ECDSA-CHACHA20-POLY1305:ECDHE-RSA-CHACHA20-POLY1305:DHE-RSA-AES128-GCM-SHA256:DHE-RSA-AES256-GCM-SHA384:DHE-RSA-CHACHA20-POLY1305;
        ssl_protocols TLSv1.2 TLSv1.3;
        ssl_prefer_server_ciphers off;

        location / {
                add_header Strict-Transport-Security "max-age=31536000";
                proxy_pass http://127.0.0.1:5230;
                proxy_set_header    Host            $proxy_host;
                proxy_set_header    X-Real-IP       $remote_addr;
                proxy_set_header    X-Forwarded-For $proxy_add_x_forwarded_for;
                proxy_hide_header   X-Powered-By;
		}
    }
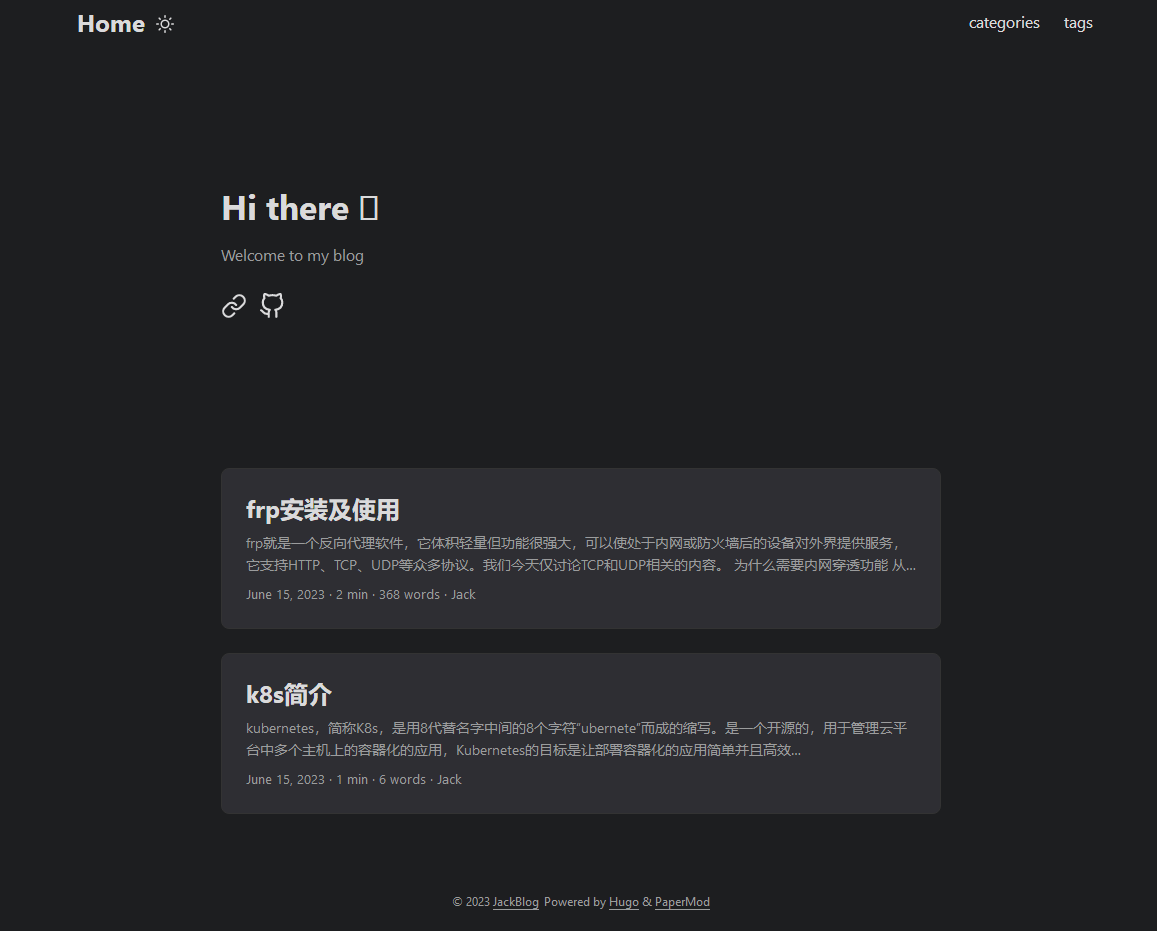
4. 结果展示